Setting up an electronic drum kit should be as easy as following the setup instructions in the manual, but some things might not be as clear if you’re new to setting up electronic drums. There are some other considerations during setup that might not be mentioned in the manufacturers instructions that we’d like to take a look at.
Starting With the Manufacturers Setup Instructions
Most electronic drum kits will come with setup instructions in the box from the manufacturer. The quality of instructions can vary. Some might be incredibly detailed and some might not be. Even if the instructions aren’t very good, you can usually figure out how to get a kit setup by looking at a combination of the setup manual and photos of a completely setup kit. You can sometimes find photos on the manufacturers website or the sale page of the place you purchased the kit from.
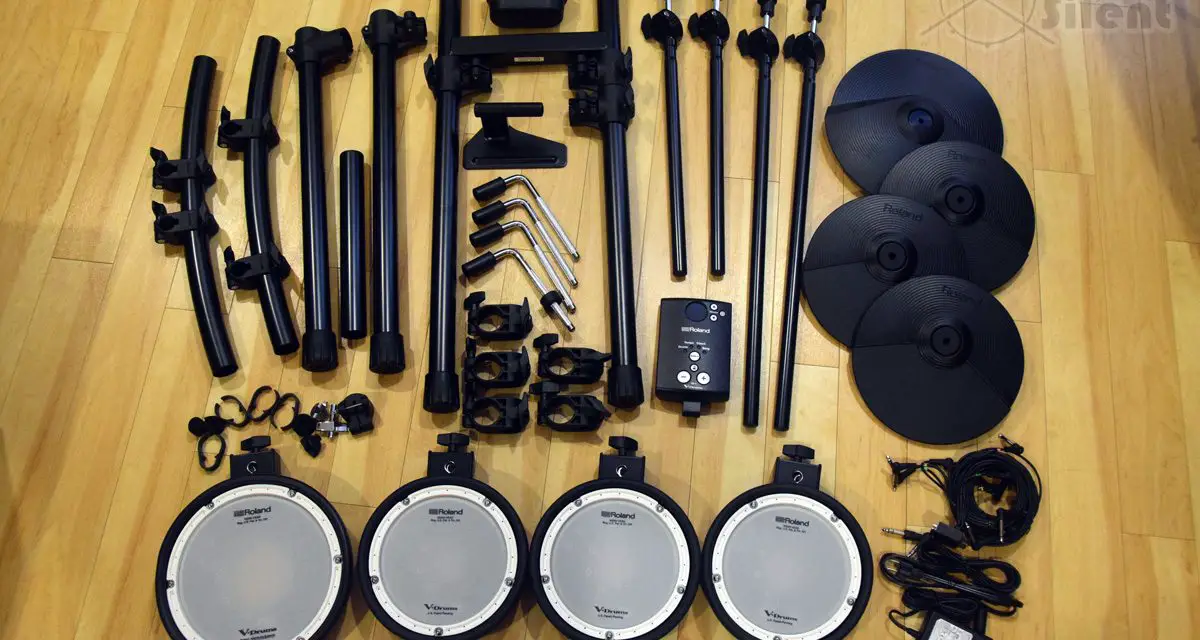
At a minimum, you should be able to rely on the setup instructions to see what parts are all included. Before you start putting anything together, take all the parts out of the box and unwrap everything. Lay out all the parts on the floor and start analyzing what parts are there, which parts are similar, and group them together so you have a full picture of all the parts you’ll need to put together. This is a also a good time to catch if any parts are missing, which is rare but can happen.
Setting Up The Drum Rack
If you’re lucky and purchased a kit like the Simmons Titan 50 or Titan 20, you’ll find the rack fully setup in the box, which is pretty awesome. However, most electronic drum kits will require rack assembly.
Usually the trickiest part of setting up an electronic drum kit is getting the rack assembled. This can be tricky due to parts that might look very similar, which can cause confusion. There might be tubes or braces that look very similar but are slightly different in length, or there might be bracket holes punched in different spots on two similar looking braces.
When following the instructions to set up the rack, don’t tighten up anything fully at first. Only tighten up braces and brackets enough to stay in place, but leave them loose so you can adjust positioning, rotate braces/brackets and generally move things around easily while you’re getting it all in place and figuring out where the parts go.
Once you have the rack mostly setup, it’s still good to leave it somewhat loose so that you still make adjustments while adding the pads, cables and drum module.
Mounting the Drum and Cymbals Pads on the Rack
This is where things get more fun. Mounting the pads is where you start to make decisions regarding you’re own personal preferences on how a drum kit should be set up.
Some drum kits will be less flexible in allowing you to put pads wherever you want, but some can be very flexible. Usually the budget kits are more restrictive, but that isn’t always the case.
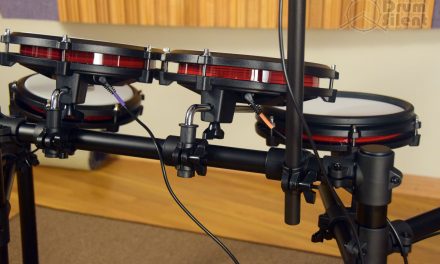
When positioning pads around the kit, try to do it in a way that is similar to how you’d expect drums and cymbals to be placed on an acoustic drum kit. By that, I mean don’t fall into the trap of putting all the pads super close together or making it much more compact than what you might typically do with acoustic drums. This might mean leaving some space between the tom pads, not putting the hi-hat pad directly above the snare, and giving your cymbal pads some appropriate height and separation from the drums pads.
I like to spread the pads out about the same distance as I’d do with an acoustic drum kit so that when I switch between my electronic and acoustic kits my playing translates better and the positioning doesn’t feel wildly different. I’m also picky with the tilt on the cymbal pads myself and tilt them about the same as I’d normally have my acoustic cymbals tilted. That means leaving the pads mostly flat and not overly tilted towards myself, at least in my case. But that is also a personal preference and others might have their own preference. There’s no specific rules as far as drum setup goes, but that’s what works best for me.
You also might find that you’ll want to readjust the pads once you start playing, and there’s nothing wrong with that either, so don’t feel like you need to get it perfect the first time you setup the kit.
Adding the Drum Module
Usually it’s best to mount the drum module where the manufacturer recommends. This is due to the fact that the cables that come with the kit are usually at a certain length that will work best with the recommended module placement. If you try to mount the drum module in a different spot around the rack, you might find that individual cables on the cable snake come up short when trying to connect to certain pads.
Connecting the Cables
Once you have the rack setup and the pads and module mounted on the rack, it’s time to connect the cables. Most kits have a cable snake with each individual cable labeled so you know where to plug it in. The cable snake plugs in to a single port on the drum module and then the individual cables plug into the pads and the pedals. If your kit has individual cables, setup is about the same but you’ll have to plug a few more things in.
I like to separate and untangle the cable snakes as much as possible before plugging anything in, sometimes they can be tangled up almost like braided hair. By untangling, it looks better and the cables will also be better able to reach the various pads around the kit without coming up short. I start by plugging in the pads closest to the module and work my way out from there.
I also like to run all the cables around the back side of the rack and pads as much as possible to keep them from draping in front of the rack. When I plug in all the cables at first I’ll also let them hang loose and not strap them up with any cable straps right away. I leave them hanging loose until I’m fully done positioning all the pads, just in case I move anything around in a way what would require me to also re-route a cable.
Sit Down At The Kit And See How It Feels
After loosely setting everything up, including the rack, the pads, the module and cables, now it’s time to sit at the kit. Sit down on your drum throne set to your preferred height and make sure you have sticks in hand so you can get a feel for positioning and distance. This is where you’ll start to realize what adjustments you need to make.
You’ll want to move the snare pad to a proper playing height and tilt angle. You’ll want to make sure the hi-hat feels naturally placed in regards to distance from the snare pad. You’ll want to adjust the tilt on the toms and maybe even horizontal or vertical positioning (as much as the rack allows) to set them into a natural feeling position. And the same with the cymbal pads.
You’ll also want to analyze the floor pedal placement at this point. I like to setup the pedals about the same as they’d be positioned on my acoustic drum kit, which gives me a frame of reference and helps the setup feel natural during play.
At this point, try to refrain from fully tightening everything yet until you have adjusted positioning for all the pads. Only start tightening down everything fully once you have everything where you want it.
Now Tighten Down The Pads and Drum Rack Braces
Once you have everything positioned the way you prefer, it’s time to tighten everything down. When tightening up the braces and brackets around the kit, I prefer to only tighten as much as I need to in order to keep things from moving around. Over-tightening might break plastic brackets and braces, which isn’t fun to deal with when you just want start playing some drums.
You might find that a newly setup kit needs to re-tightened again a couple days later since parts can stretch out or settle a little bit after the first setup.
During this process, I also like to make a mental note of which brackets would need to be loosened if I were to try to fold up the kit for storage or transport. Usually you only need to loosen up a couple brackets on the center vertical poles of the stand to fold it up.
Cable Straps Last
The final step is strapping any cables up, if you like to do that sort of thing. Many kits come with cable straps for this purpose. Depending on the kit I might leave the cables loose, but if it’s a kit I’m going to move around more often it can be worthwhile to strap them in place to keep them from tangling up later on.
Test Pads and Tweak Velocity/Sensitivity Settings
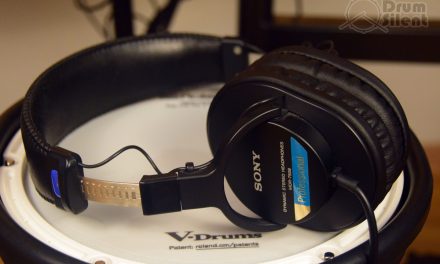
Once you get the drum module powered up and can hear the kit when played, it’s time to test all the pads. Go around the kit and try all the zones on all the pads. This helps weed out any incorrectly connected pads or possibly even defective pads. It is possible to have dead pads on a newly setup kit, but it’s rare. It’s good to catch it right away so you can take advantage of any short term return policies, replacement policies or warranties if needed.
If you’re more technically minded and comfortable with doing so, you might also want to go through and adjust pad sensitivity and velocity settings to fit your preferences. Many kits are fine out of the box, but if you notice any re-triggering or crosstalk with any pads, look for those settings in the module and try tweaking to fix the issue.
Firmware Updates for the Drum Module
Another thing worth looking into if you don’t mind digging into the tech is to check and see if your drum module has any firmware updates that can be applied. Some manufacturers post firmware updates on their sites that can be downloaded and loaded onto the module. These updates can often add new features or fix bugs.
Have Fun Drumming
Hopefully this run-down get you going in the right direction if you’re new to setting up electronic drum kits. Luckily most kits are designed to be setup fairly easily as long as all the parts are in the box, but it can still take an hour or more to get it done. Just remember to be patient and don’t rush the process, and you’ll have good results and be playing drums in no time!


